
These are my personal notes as I go through the installation process of setting up OFBiz on an AWS t2.micro server.
My OFBiz Documentation
OFBiz for Eclipse Setup - Local Computer Starting Point
OFBiz Catalog & Category Setup
These are my personal notes as I go through the installation process of setting up OFBiz on an AWS t2.micro server.
My OFBiz Documentation
OFBiz for Eclipse Setup - Local Computer Starting Point
OFBiz Catalog & Category Setup
OFBiz: “Open For Business” is a set of enterprise applications built on a similar architecture using common data, logic and process components. Being one of the flexible and easy to use Open source Digital Commerce platform Apache OFBiz is still the most reliable and integrated platform till date. It is the best open source product for the automation of enterprise processes that include framework components and business applications for ERP(Enterprise Resource Planning), CRM(Customer Relationship Management) that can be used across various sectors.
We at Viithiisys are working in depth on OFBiz from more than 10 years currently and other Apache frameworks. Our team has been working on E-commerce development, Back-office application customization, ERP implementation, custom application development based on OFBiz framework. Meanwhile, we thought of making people aware of the advantages and introducing users to OFBiz platform through an user-end blog series on Apache OFBiz. In these blogs we will be discussing different modules of the Apache OFBiz in detail.
Areas to be covered in this series would be —
● Catalog Manager
● Facility Manager
● Party Manager
● Manufacturing
● Order Manager application
● Framework Web Tool
● Entity Data Modal
After getting well verse with OFBiz, you can get started without the huge deployment and maintenance costs of traditional enterprise automation systems. As your business grows you can extend the functionality to meet your more sophisticated needs.
● This initiative took by us aims at making people aware about the reliable nature, ease of use and fast speed of OFBiz.
● We will start from the basics and guide every aspect of the language individually.
● This will help the community of Apache OFBiz developers to grow as more and more developers start using it and understand the importance of Apache OFBiz software and recommend to others as well.
Dive into our OFBiz Series and explore every module of the framework. If you find something that we missed or should be included in our “Apache OFBiz: Functional User Guide” please share it with us. Thanks for reading this far and I hope it helps you on your journey!
Apache OFBiz manages suppliers and associated products with them for purchase purpose. A supplier can supply more than one product where as different multiple suppliers can supply a single product. So, if you want to purchase a product, it has to be associated with at least one supplier.
There are some steps to create a supplier:
1.Create new person for creating a new supplier.
2.Assign role of Supplier to the new person created.
3.Associate suppliers to the respective product.
Following are the steps to create product Supplier:
1). Go to party manager and click on option “party” from the dropdown.
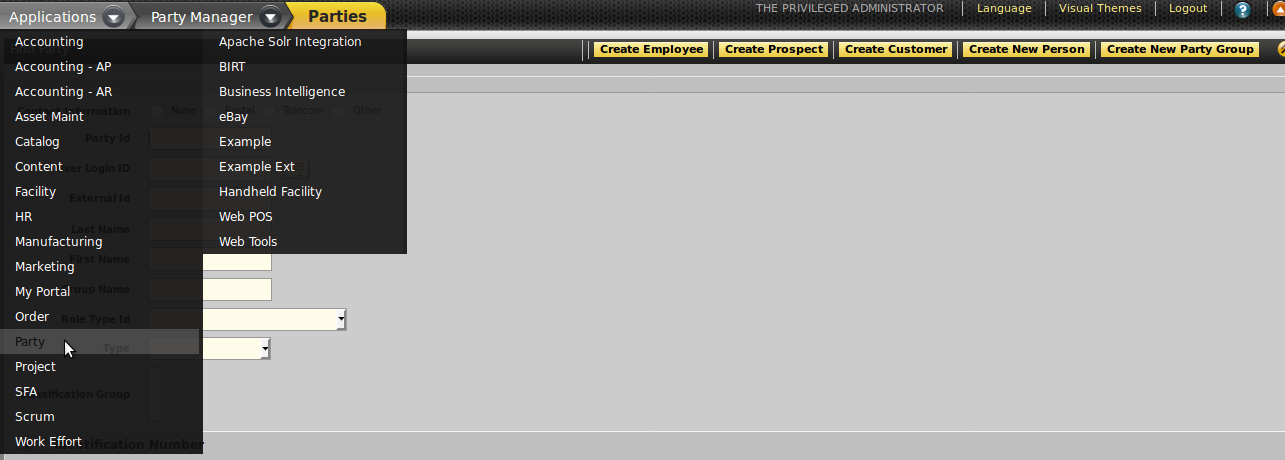
2). Click on “Create new person” button.
3). Add details like party id, product type, Owner, Preferred Currency Id and finally click on “save”.
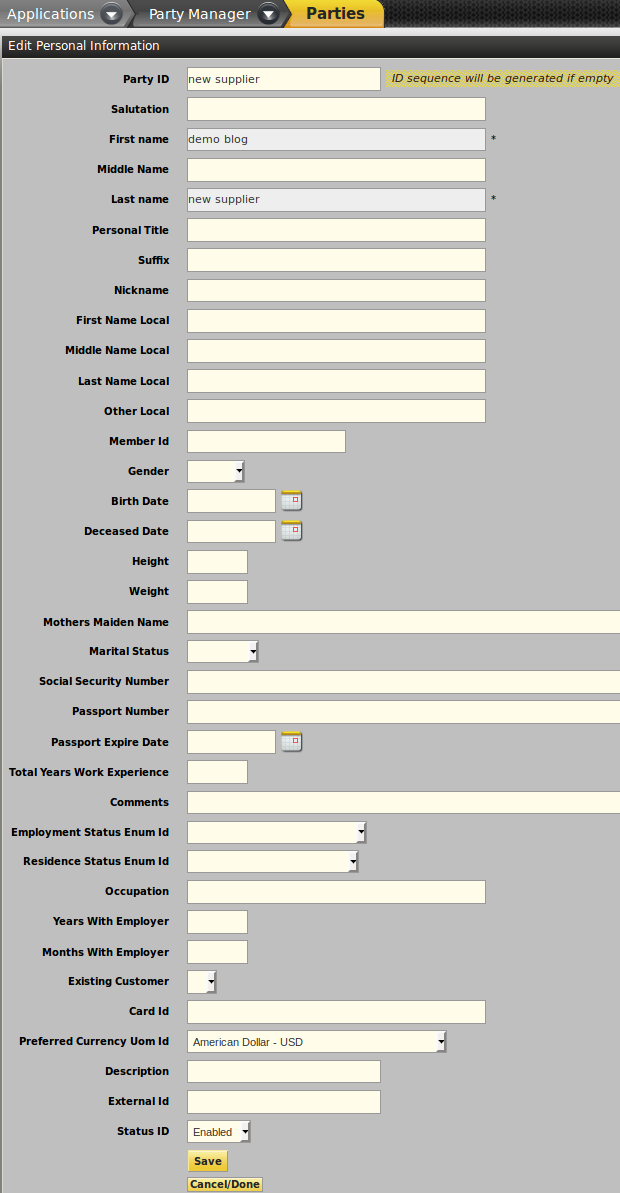
Following are the steps to assign role of supplier:
1). Click on “party” from the dropdown and search created “supplier_id”.

2). After opening “created supplier_id”, click on role button.
3). Add Role as “Supplier” from drop down finally click on “Add”.
Following are the steps to associate supplier to the product:
1). Go to catalog manager and select “catalog” from the drop down.
2). Open a product and click on “supplier” button.
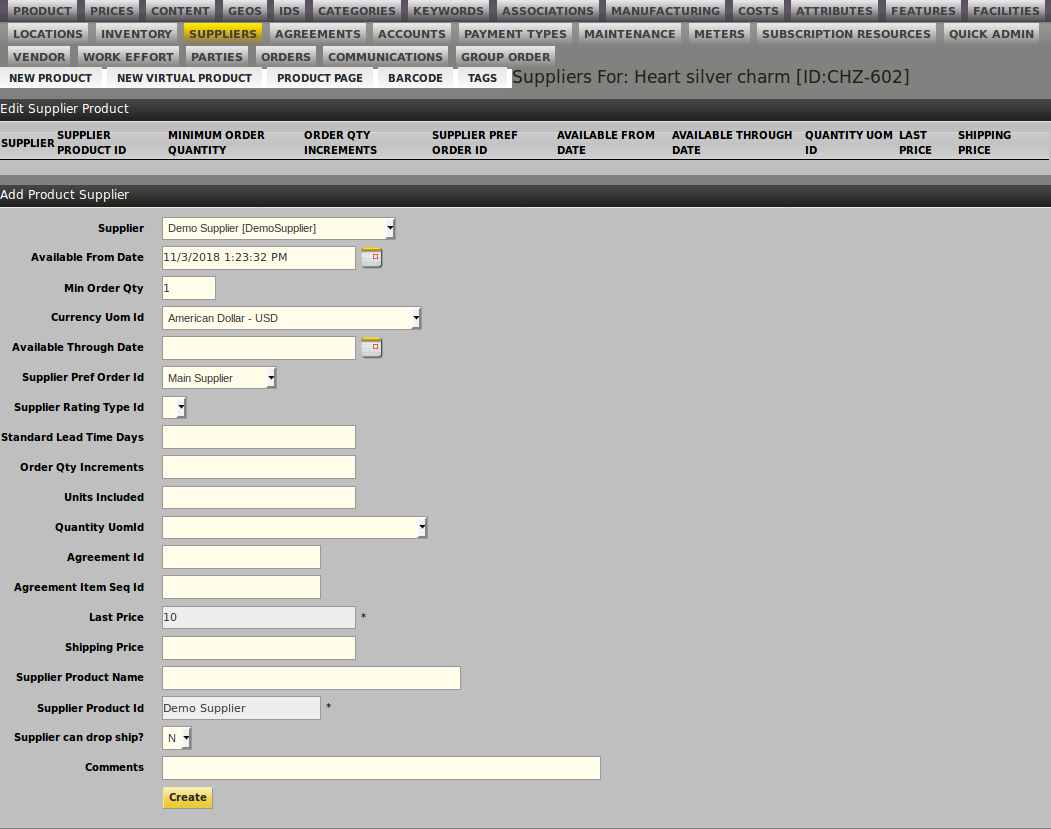
3). Select “Supplier id” from dropdown and add details like Min Order Qty, Currency Uom Id, Last Price(The price at which you purchased item from the supplier), Supplier Product Id and finally click on “create”.
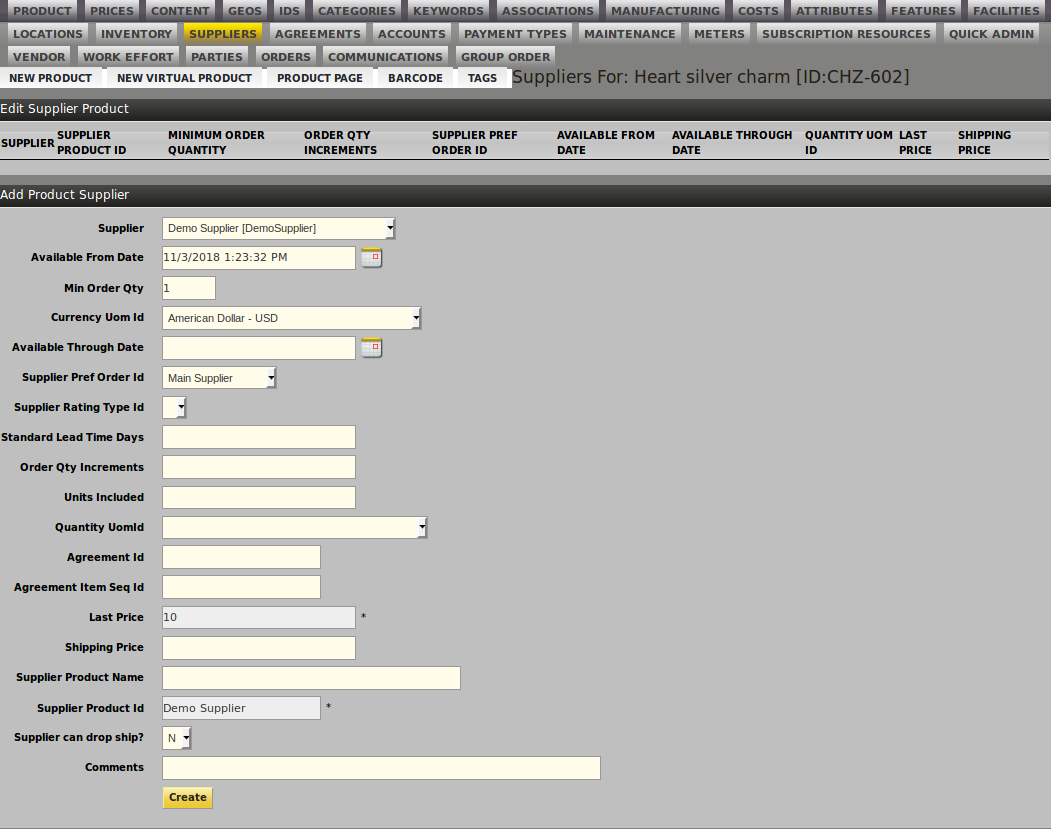
Add multiple suppliers for a single product that should fetch/reflect in OFBiz E-commerce.
If a product is purchased from two or more suppliers then assign multiple suppliers to a single product. Supplier list price calculates the average cost of product. In E-commerce we can easily manage the purchasing quantity of products bought from different suppliers and also easily return them if defective products are shipped.
OFBiz provides different types of shipping methods where we can set the shipping methods according to differents stores. Types of shipping methods included in OFBiz are: Ground, Air, Next Day, No shipping, United Parcel Service (UPS) and United States Post Office(USPS). We set different prices and estimate rules for the different shipment types.
Shipment Settings can be changed from the below pages:
1). New Shipment Method
2). New Shipment Estimate
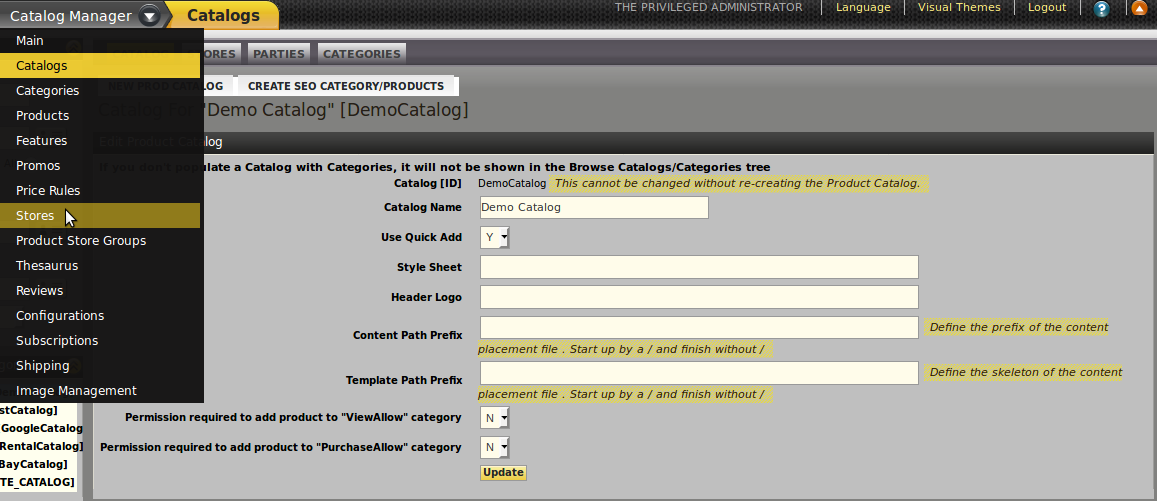
● Firstly Go to Catalog Manager, select store from drop down open and select shipping tab.
Set Shipment method:-
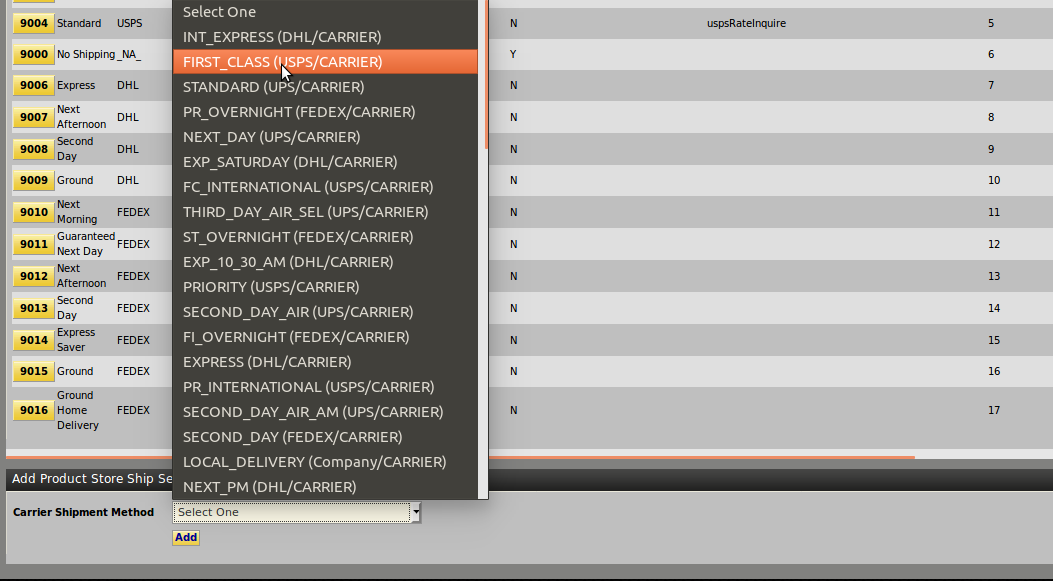
1). Select shipping method from the “Carrier shipment method” drop-down. Click on add button.
2).Enter the Include/Exclude Geo countries, Party Id and all other required fields.
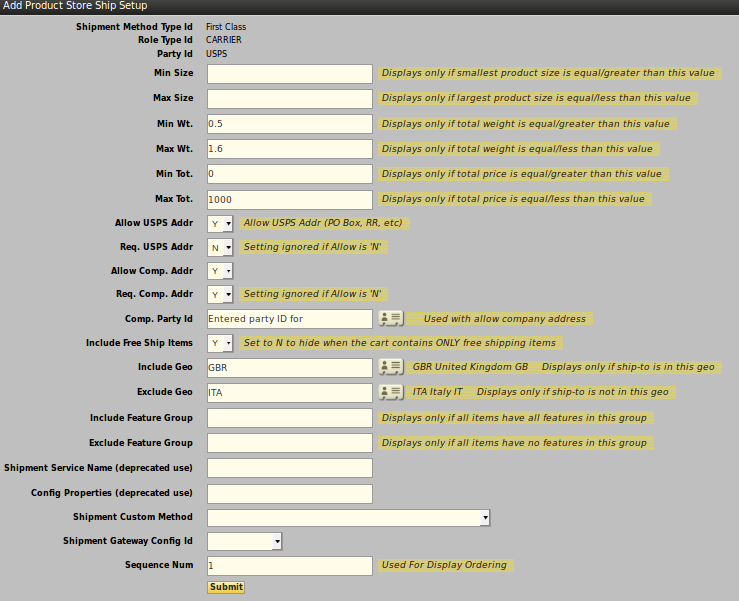
(In this shipping method “geo country” United Kingdom(GBR) can be included and “geo country” italy(ITA) can be excluded).
Set shipping estimates:-
We can add more than one shipping estimate for One shipping method. Firstly open shipping estimate tab then follow the
instructions given below-
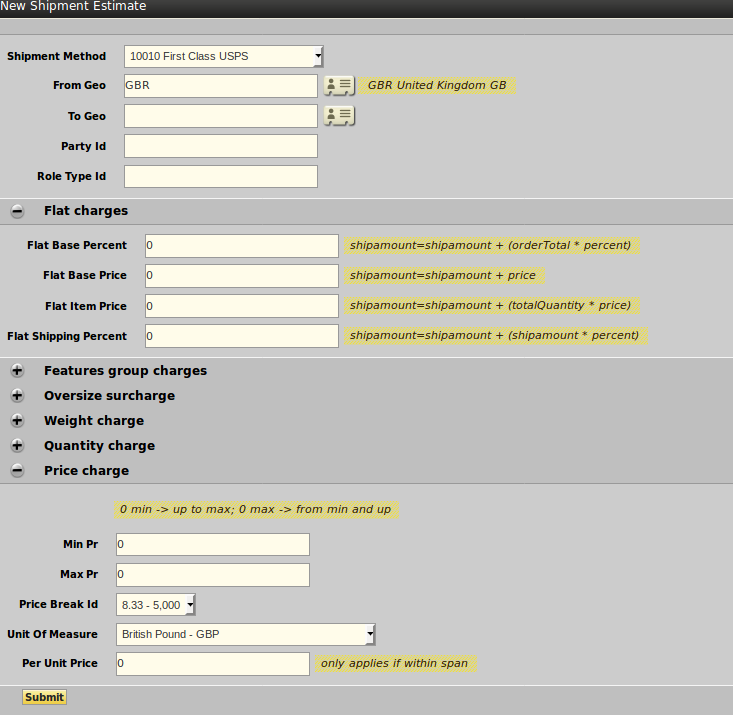
1). In shipping estimates set the Flat Base Price of shipping method, Unit of measure and Price break.
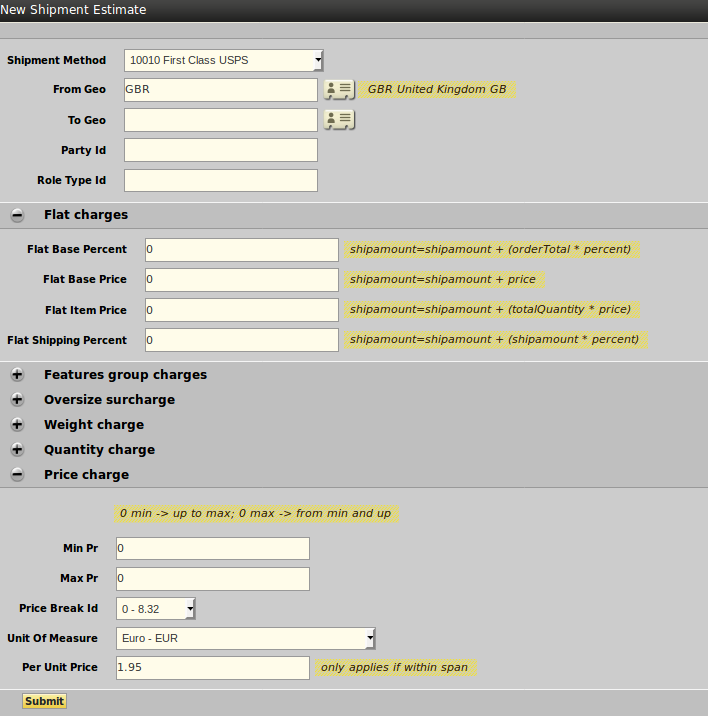
2).Price break id is used to set shipping price between two amounts(for example-set shipping charges between amount 0-8.32 whereas free between 8.33-5000)
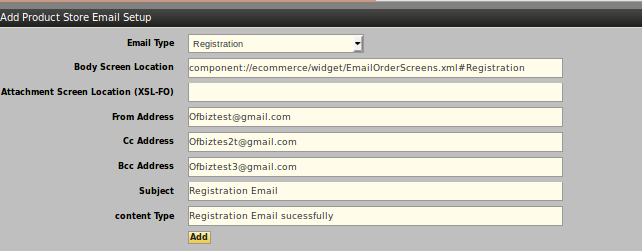
Email setting in OFBiz is used for sending confirmation message on events in any of the E-commerce sites. In OFBiz we can easily change the flow of email cofiguration.
● Open the store, select the one we want to configure with email.
● Click on email Tab and then set up email configuration.
● In the first field provided select the email type from the drop down.
● Give the location for “Body Screen Location” field that is used to design email.
● Enter the preferred customer contact email Id to contact.
● In the next field enter the details for the CC/Bcc if desired.
● In the next field that is “Subject type” and “Content type” enter the details of the content to be displayed along with the subject.
Set up promo in OFBiz:
● In ofbiz we use many types of promo discount rules in which we can specify how to create different promo discount rules in ofbiz.
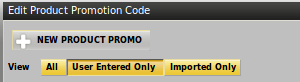
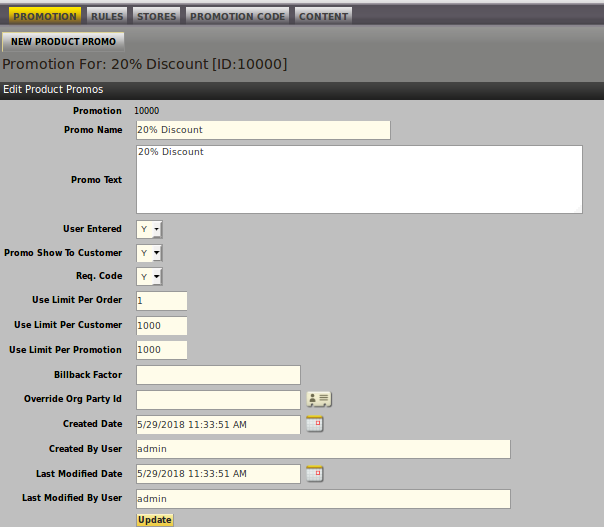
● Open “Catalog Manager” and select promo form drop down then click on “New Product Promo” button.
● In “Promo Name” field enter the promo name, in the next field “Promo Text” and enter description on promo.
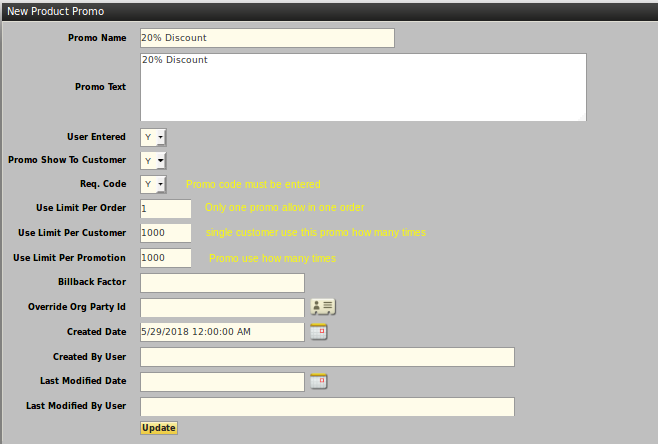
● Select Y/N according to requirement in “User Entered”, “Promo Show To Customer” and “Req. Code” fields.
● Enter all others fields and click on update button.
Add rule in promo
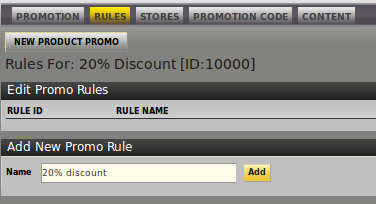
● Cilck on tab that says “Next” and open “Rules” section. In this tab we add the conditions and actions of promo. Discount on differnet types of products depends on this section.
● In “Add New Promo Rule” enter the name on promo rule.
● Select the first condition from the drop-down, from next drop-down select second condition and then enter conditional value, finally click on “Create Condition” button. For example: If there is 20% discount on a product we select “cart sub-total” in the first drop-down then select other condition “is greater than” and enter condition value “0”.
● From the drop down select the action and type of promo discount you want to add then click on “Add Action” button. Forn example : For 20% discount select Order Percentage discount,Enter Quantiy ie, “1” and Amount of discount “20”.
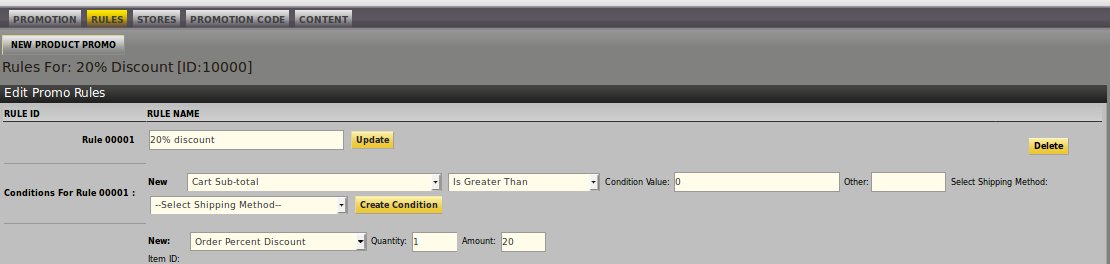
● We can use"Item ID” field to apply discount on a particular item whereas “Party ID” field is use to apply discount for a particular customer.
Add store in promo:
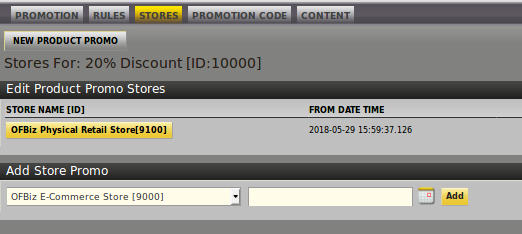
To add store in a promo firstly click on the Store tab. In “Add Store Promo” field select store from drop down and click on Add button.
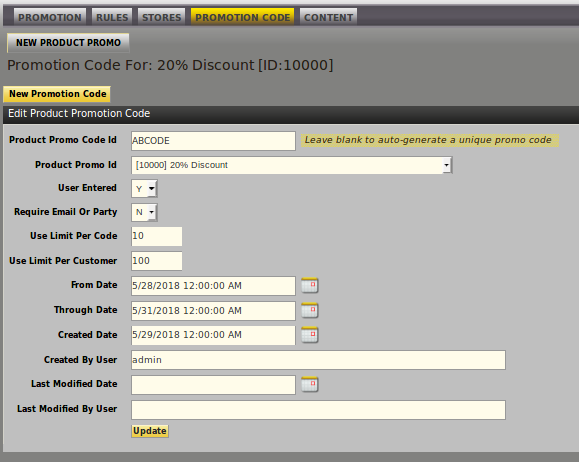
Add New Promotion Code
● Click on add “New Promotion Code” button.
● Enter “Product Promo Code Id” and select “Product Promo Id” form drop down then select Y/N for “User Entered” and “Require Email Or Party” field.
● Enter all other fields and click on Update button.
Add Promo Content
● Click on content tab and enter content we want to display with promo
● Enter From and Through date, select file/browse for upload and click on create button.
1.Discount rule when cart total greater then X.
2.Discount rule promo with free shipping.
3.Free promo item in your cart total greater then X.
4.Buy one product get another product on Z% discount.
1.X% discount apply on item when cart total is greater then X.
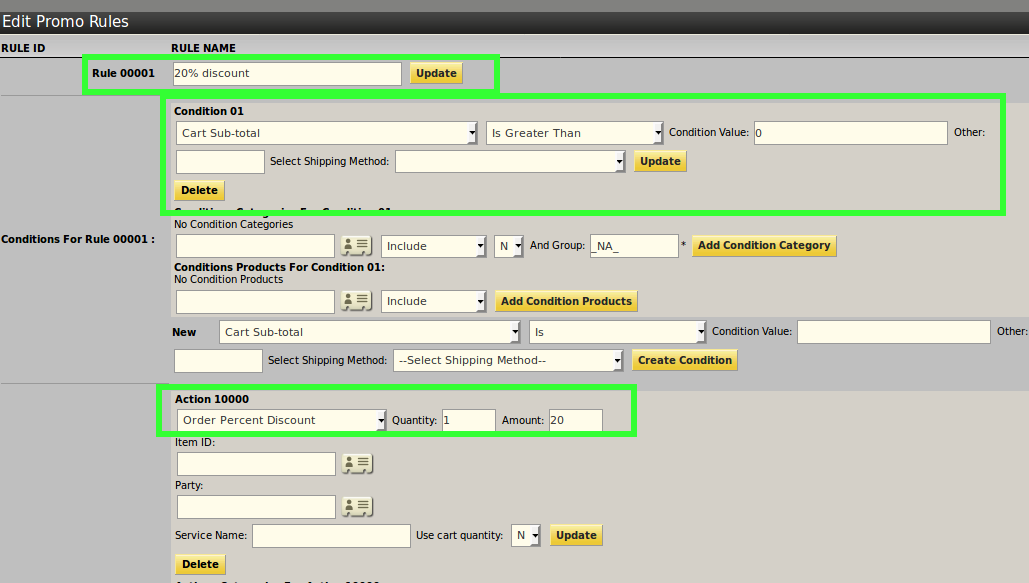
For example:In this promo add condition cart sub total is greater than 0 and action Order precent discount is 20.
2.X% discount on shipping when cart total is greater then X.
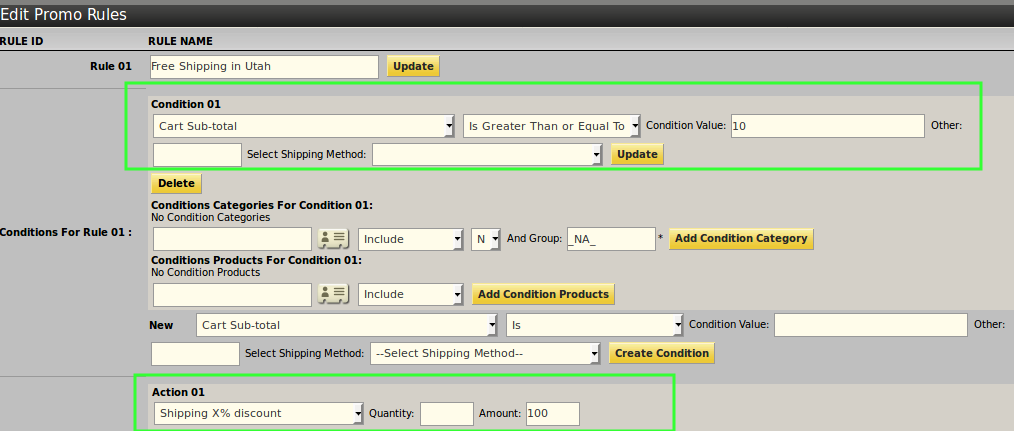
For example:
In this promo add Condition:Cart total is greater than equal to “10” and Action: Shipping X% discount.X=100 3.Buy X get Y at Z% discount(Buy one product get Z% discount on Y Product.
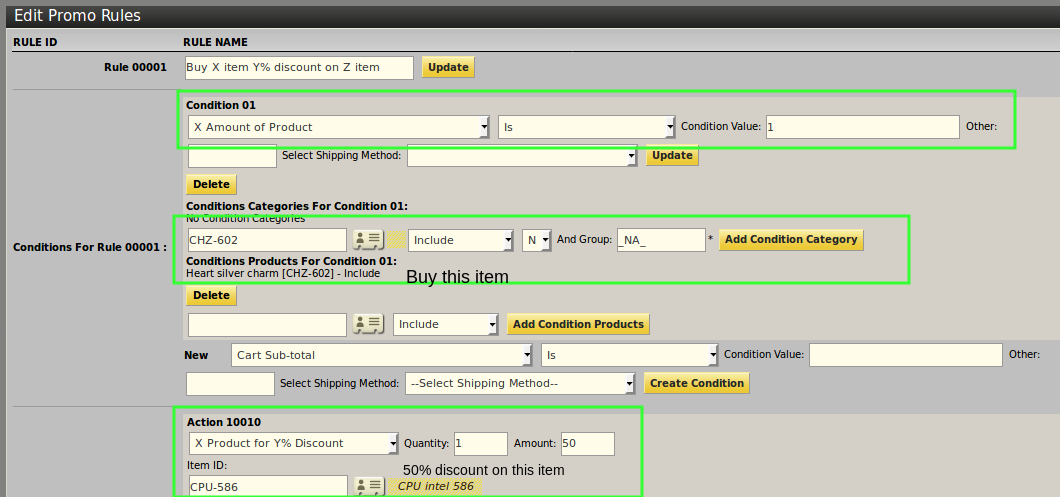
For example:In this promo add Condition:Buy a X amount of product and Action: Another product on 50% discount. 4.But one item get another item free.
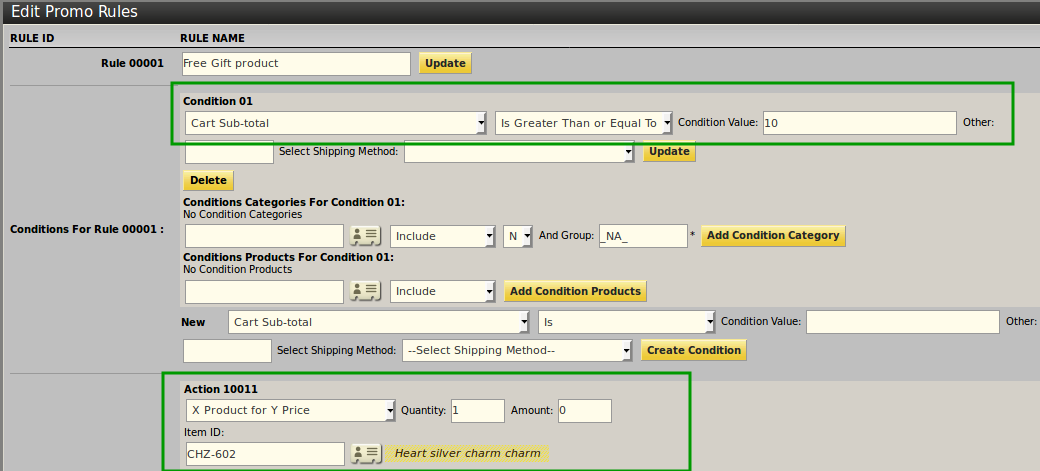
For example:In this promo add Condition:Cart total is greater than equal to “10” and Action:X product for y price y=0 (Free item add to cart).
5.Discount on particular coustmer.
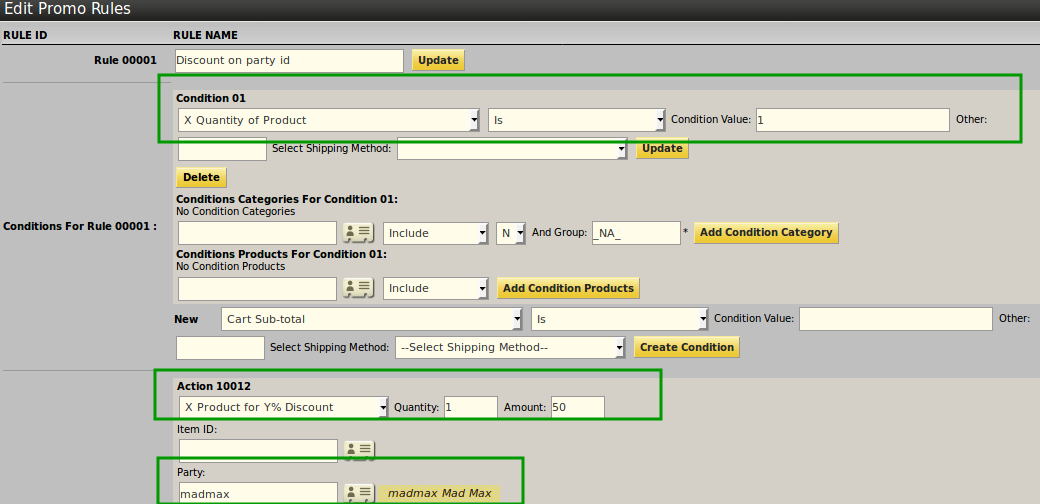
For example:In this promo add Condition:Buy a X quantity of product and Action: X product for Y% discount (50% discount on item when buy Madmax party id)